




Admin tables are fine to scan on desktop, but at nearly 20 rows per screen for reconciliation they blur—is the row height too tight or are separators missing?
An admin table may be fine to scan on desktop, but when nearly twenty rows fill one screen for reconciliation, users often read across the wrong row. This is usually not a single row-height variable, but the combined result of row height, padding, row separation cues, column width, and alignment. In common 2026 admin delivery work, the order is to first distinguish whether users are scanning or checking row by row, then set density, and finally add separation cues. Experience range for full row height: compact is about 36-40px, comfortable is about 44-52px, both including top and bottom padding. Compressing row height without adding separation cues often makes the table blurrier; being able to locate the target row at a glance matters more than fitting more rows on one screen.
Why fitting more rows on one screen makes row misreads more likely
Table reading and editing efficiency is not determined only by how many rows fit on one screen. When people locate the next target in dense rows and columns, they rely on stable visual cues between rows; if those cues are compressed until they disappear, the eye can only locate by counting row numbers, which is slower. Reducing full row height from 48px to 32px can add roughly 30% to 40% more rows per screen, which is a typical range, but scan error rates often rise at the same time, especially in columns such as amounts and statuses that require horizontal comparison.
Another often overlooked point: row height is only one density variable. Column width and alignment also determine how hard horizontal scanning is. When column widths vary and numbers are mixed between left and right alignment, users must re-find the column position on every row; fine-tuning row height at that point yields very limited improvement.
- Row height determines vertical locating difficulty, while column width and alignment determine horizontal locating difficulty; the two must be reviewed together, not adjusted on only one side.
- Separation cues (horizontal lines, zebra striping, whitespace) are the main way to prevent row misreads and usually save more space than simply adding row height.
- Amount and quantity numbers should generally be right-aligned with tabular figures enabled, so they do not jump when digit counts differ.
- Rows per screen is not a performance metric; the table passes only when users can locate the target row at a glance.
First decide whether users are scanning or checking row by row
For the same table, an operations user scanning for anomalies and a finance user checking documents row by row have completely different tolerance for density. Scanning tasks can be denser because users only need to quickly locate a few targets; checking tasks need looser row height and stronger row separation because users must read multiple fields in each row together. In 2026 project delivery practice, these two page types usually do not share one density parameter set; forcing them to be unified often makes both sides worse.
- Scanning type: viewing trends, finding anomalies, picking one row to open; fewer columns and clear targets allow compact density.
- Checking type: verifying amounts, IDs, or statuses screen by screen; needs looser density and clearer zebra striping or horizontal lines.
- Mixed type: most admin lists belong here. To judge, ask how many rows users typically review before deciding; more than about 10 rows leans toward checking.
- Counterexample: compressing a checking page into a compact table to look information-dense, only for operations users to zoom in on screenshots, increasing communication cost.
Three-layer cue method: how to order row height, separation, and alignment
Rather than debating whether to change row height first or add zebra striping first, handle it in this order: vertical locating, row separation, horizontal alignment. The change cost of these three layers rises: row height requires changing one global parameter, separation cues require style changes, and alignment depends entirely on column definitions. Doing the cheap, fast-acting layer first can save considerable rework.
- Row-height layer: first set a base unit, for example a multiple of 8px; adjust row height and top and bottom padding as a set, not one item alone.
- Separation layer: do not use horizontal lines, zebra striping, and whitespace all at once; choose one as the main cue, and keep it weak enough not to compete with the content.
- Alignment layer: left-align text, right-align numbers, center statuses; leave column width for longer values so users do not have to hover to see truncated content.
- Review: temporarily set row height tighter and looser and check both, confirming neither extreme causes row misreads before finalizing.
Notes for each layer: in the row-height layer, do not sacrifice top and bottom padding just to fit more rows, or even a larger row height will feel cramped; in the separation layer, keep zebra striping contrast very light, because if it is too dark it may be misread as a selected state; in the alignment layer, once alignments are mixed, users must re-locate on every row, and even perfectly tuned density will be wasted.
Compact vs comfortable: how to choose within the experience range
The following are two common parameter tiers in 2026 project delivery, for starting reference only; adjust according to column count, field length, and user task. Here full row height includes top and bottom padding, not font line spacing.
- Compact: full row about 36-40px, 15-25 rows per screen, a typical range, suitable for scanning, logs, and monitoring pages; the tradeoff is a need for stronger separation cues, and it should not be copied directly to mobile.
- Comfortable: full row about 44-52px, 8-12 rows per screen, a typical range, suitable for checking, approval, and reconciliation pages; the tradeoff is less information per screen.
- Adaptive approach: configure two or three density tiers in the component library, let pages choose by task, and avoid a global one-size-fits-all setting.
- Cost reference: for adjusting only row height and separation styles, the experience range is about half a day to one day; if it involves reordering column priority and mobile card conversion, the experience range is 1-3 days, depending on column count.
In a 2026 reconciliation admin delivery, the constraints were a timeline of only a few working days, about 10 columns, and a stakeholder request to fit more rows per screen. We did not directly compress global row height; instead, we ranked column priority, removed two columns that did not participate in decisions, kept comfortable row height, and added light horizontal lines. After launch, operations reported fewer row misreads, at the cost of first-screen visible rows falling from the typical range of 15-25 rows to 8-12 rows. This kind of tradeoff usually saves about half a day to one day of rework compared with adjusting row height page by page afterward, but only if columns can actually be removed.
Applicable scenarios and boundaries
This density and separation judgment suits desktop admin lists with many columns that require repeated horizontal comparison. It does not suit every table: for simple lists showing only three to five rows, where users enter the page only to see one or two fields, forcing density rules only increases maintenance cost.
- Suitable: lists for approval, reconciliation, order management, log viewing, and similar tasks that require row-by-row checking or repeated scanning.
- Suitable: when multiple lists in the same system have very different tasks and density needs to be set per page.
- Do not force it: small overview lists that usually have single-digit row counts can keep default density.
- Not suitable: copying desktop density to mobile. The experience range for touch targets is 44-48px; compressing row height easily causes mistaps, so it should usually become cards or fewer columns.
- Boundary statement: density is a task attribute, not a page attribute; when the same table changes use case, the appropriate density changes with it.
Acceptance criteria can be very specific: ask someone unfamiliar with the page to find three specified records in a row, and record time and error count; if it is clearly higher than other lists in the same system, density or separation cues need adjustment, not user skill.
FAQ
Is a 32px row height always wrong for admin tables?
Not necessarily. For mouse-driven log-style tables intended for quick scanning, 32-36px is a usable range, but it needs stable separation cues, and keeping columns to 6-7 or fewer is safer.
Can zebra striping and horizontal lines be used together?
Usually choose one. Using both can make the table look dirty and may be confused with a selected state; when there are many columns and a wide horizontal span, prefer horizontal lines; when rows are short and columns are few, light zebra striping or plain whitespace can work.
Do you need a fixed header?
When a screen shows more than about 10 rows and users must scroll vertically to see all of them, a fixed header is usually useful; for small tables with few rows, it does not need to be forced and only takes up height.
How should number columns be aligned to avoid confusion?
Right-align numeric values with tabular figures, use consistent decimal places for amounts, and left-align text columns. Mixing center and right alignment makes users re-find column positions on every row, slowing reading.
Should mobile still use compact density?
Not recommended to copy directly. The experience range for mobile touch targets is 44-48px, and compressing row height easily causes mistaps; tables with many fields usually become cards, keeping only the columns involved in decisions.
Before starting, confirm three things: whether this table is for scanning or checking, roughly how many rows should fit on one screen, and whether users will scroll vertically. It is best to change only row height and separation cues first, collect one round of feedback after launch, then decide whether to reorder column priority or create density tiers. Tables mainly for overview and with consistently few rows can keep defaults. In a specific project, density parameters are usually written into the component specification to avoid each page adjusting its own set; if column counts and task types differ greatly, per-page tiers save more rework than global unification.
-
 UI Design & Prototype for Sunwayland's ThingNet IIoT Platform
UI design and prototyping for ThingNet IIoT ...
-
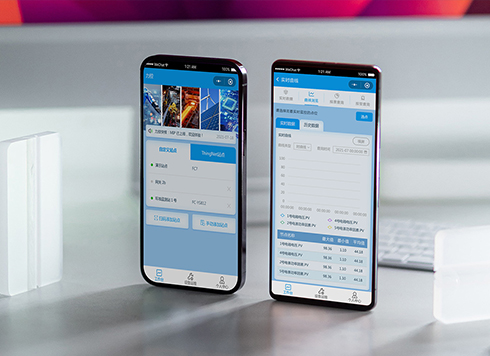 Likong Industrial IoT Tech Co., Ltd. Mini-program UI/UX Design
IIoT firms: mobile mini-program + platform. ...
-
 Livy Pig Farming IoT Platform UI Design
This IoT system uses sensors to monitor hog ...
-
 UI Design of the Internet Advertising Platform (a Sci-tech Sense Official Website)
The corporate website UI features a futuris ...
-
Status labels look distinct on a computer but look the same on a conference room screen—is it projection color shift, or are the labels only using color?
Date: Oct 13, 2026 Read: 9
-
Some amounts in a table have two decimals and some don't, and right-aligning still leaves them misaligned—is the decimal point not aligned?
Date: Oct 12, 2026 Read: 15
-
When an admin list is empty on first open and users keep waiting for it to load, is the empty state failing to tell them they can create one?
Date: Oct 11, 2026 Read: 20
-
On Mobile, Amount and Phone Number Fields Show a Letter Keyboard—Is It Because the Input Types Weren't Configured Separately?
Date: Oct 10, 2026 Read: 20
-
Button text spills outside the border after the English version goes live—is English really too long?
Date: Oct 9, 2026 Read: 17