



Are Bigger UI Buttons Always Better?
UI buttons are not necessarily better when larger. Conclusion first: what determines whether a button is easy to click is its clickable hit area, adjacent spacing, and operating scenario—not its visual size. In 2026 project delivery conventions, touch targets on mobile typically use an experience range of 44–48 logical pixels; on desktop, 24 px and above with whitespace is common. If you only enlarge the button’s visual size while shrinking the hit area or placing it flush against another clickable element, the mis-tap rate won’t come down.
Why a bigger UI button is not necessarily better
An oversized button first squeezes out page whitespace. On a mobile phone used one-handed, the thumb’s comfort zone is limited. When the primary button is deliberately stretched into a full-width band, it pushes the input box above and the auxiliary information below out of the natural thumb area, requiring users to scroll or switch hands. The task path gets longer.
During project delivery, an “I want it to stand out” request often causes rework. For example, on a form page the client asked for the login button to be even larger, and set its width to the full screen width. As a result, the button’s bottom edge sat right at the thumb-base area after the keyboard popped up, so users kept touching the system input method or accidentally hitting the “Forgot password” link next to it.
Our constraints were: the layout width was already fixed, and the schedule did not allow a re-layout. The approach was to keep the visual width at roughly three-quarters of the screen width, set the actual hit area to at least 48 px, and widen adjacent spacing. The result was a clear drop in mis-taps, at the cost of an extra round of exception-handling adjustments on the development side. The lesson learned from this delivery: check hit area and spacing first—that is typically more effective than just enlarging the button.
- More visual area does not equal a higher click success rate; the system registers the hit area behind the button.
- When a single screen contains multiple nearly full-width large buttons, users find it harder to tell which is the main action.
- A visibly larger button is useful for visual hierarchy, but only when you clear controlled spacing around it; emphasis should not be achieved by filling the space.
Here is an experience comparison between enlarging the button and widening the spacing:
- Enlarge the visual size: suited to emphasize a single primary action; on mobile, it often goes from 40 px to 48 px. But if the surrounding tappable targets stay unchanged, the mis-tap improvement is limited, and typical rework takes less than half a day.
- Widen the spacing between the button and adjacent controls: a common mobile increment is 4–12 px, development change cost is low, and in most cases it directly reduces mis-taps.
- Expand the hit area without changing the visual size: suited for icon buttons and list-row actions. A common pattern is to expand a 24 px visible control to about 40 px hit area, which requires the development team to implement it as a separate hit-area layer.
What really affects click feel is more than the button border
When a finger presses down, the system reads the clickable layer, but we often see implementations in which “it looks like a button, but only the text inside is clickable.” If decorative borders, rounded backgrounds, or transparent padding aren’t included in the click coordinates, users keep tapping empty space. The user’s first reaction is that the button is too small, but the actual cause is that the hit area doesn’t cover the visual boundary.
According to 2026 acceptance conventions, design files should include an extra hit-area layer instead of leaving developers to infer it. The hit area should cover at least the visible button area. In dense lists, keep a recommended gap of 8–12 px (experience range) between the button and other tappable targets. When space is insufficient, adjust the adjacent icons’ hit-area sizes to yield instead of allowing two directly tappable targets to squeeze together on the boundary.
- Check method: when you draw the button and its neighboring links/icons as semi-transparent hit areas, there should be no narrow seam where their click regions overlap.
- Don’t place the primary button too close to destructive actions such as “Delete” or “Back.” If necessary, use a divider or font weight as a visual cue, rather than relying only on enlargement to remove the risk.
- The ones that truly cause costly mistakes are small secondary buttons like Delete or Cancel, where a wrong tap has a higher cost. Their surrounding spacing should be secured first.
How to set button sizes for mobile, desktop, and touchscreen
The input device determines the proper size. The mouse can position precisely, so forcing every desktop button to 48 px is not necessarily more stable—it only makes the pointer travel farther. On a touchscreen, the finger makes contact over a larger area, and overly small targets are hard to hit. When building cross-device interfaces in 2026, set a baseline by device type, then adjust spacing against the actual layout.
A usable experience range is: mobile core actions use 44–48 px; secondary actions use 40 px with larger neighboring gaps; desktop buttons commonly use a minimum height of 24 px, and if they are in a row action, also keep at least 8 px of click spacing. Touchscreen all-in-one devices and in-car screens should be treated as touch devices, so returning to 44 px and above is safer. When exporting at a real device pixel density, you need to convert to physical pixels, but design specs should consistently use logical px to avoid annotation errors like multiplying by two.
- Laptops with a trackpad need more margin than a mouse; the desktop minimum should be raised to 32 px.
- Icon buttons in narrow toolbars can remain visually 24 px, but their hit area should be expanded to around 40 px.
- Run a real-device self-test with a thumb blind-spot check—it gives you a closer view to real use than a size chart alone.
Here is a delivery-side case: in a backend table inside an enterprise admin system, the original row-action buttons were only 20 px high, and mouse users couldn’t click them quickly. We could not enlarge the visual buttons inside the table row without breaking row height and density. We kept the visuals compact and expanded the button hit area to 32 px. After launch, the mis-tap rate decreased, and row height did not increase noticeably. The cost was that the front end had to configure hit areas separately and regression testing had to check one more layer.
Use a “tap–spacing–scenario” three-step check to decide if a button size is right
Rather than arguing over “bigger or smaller,” break the question into three items: which behavior on the page is the primary task, how many tappable neighbors sit next to this button, and whether the natural finger landing covers it. The three-step check below is actionable and ends with checkable items.
- Check purpose: Does this screen have only one key action? For a main operation with low tolerance for error, such as payment or sending, design a hit area that stands out within the group. For a simple “Continue reading” below content, keep a regular button.
- Check neighbors: Starting from the button’s center, extend about half a screen left and right, then mark every tappable target whose edge is within 4 px from the button. If there are more than two, prioritize widening the gap or move secondary actions into an overflow menu.
- Check the landing point: Put the interface on a real prototype, and use a thumb-sized round patch to simulate the tap landing point. Verify that the clickable area inside the button fully covers the visible content; at the very least, tapping the edge of the button should not trigger a nearby control.
The most easily skipped step is “check neighbors.” Most mis-taps are not caused by the primary button being too small, but by its being next to a larger hidden hit area—such as a whole clickable card or list row. Before redrawing, mark the overlapping hit areas. Adjusting spacing is usually faster than changing size, and easier to explain to developers.
When is it worth making a button bigger, and when not?
Typical scenarios that deserve enlargement: the page has very few dominant tasks, such as login submission, lock-screen authorization, or emergency help; the environment is low-light or the device is used while moving—handheld data entry and car center consoles are examples; or the target users include seniors and people with low vision. In these cases, keep the button hit area as close as possible to the thumb’s quick-reach comfort zone, and you can notably reduce operating pressure.
Scenarios where you don’t need to force it bigger: high-density backend tables, approval lists, and editing toolbars. Buttons should follow the rhythm of the form; forced enlargement simply squeezes field width. On complex multi-action pages, if every button is huge, the visual emphasis disappears. And if a swipeable area is occupied by a giant button, it will compress the starting zone for gestures—validate on a real device before deciding.
- Good fit: a single primary action, portable touch environments, interfaces with higher accessibility needs.
- Not a good fit: data-dense operations, batch processing in tables, and primary buttons in multi-touch gesture zones.
- Reverse reminder: when a button is placed at the edge of the screen, the system edge-back gesture can claim the click boundary. In that case, you may need to add padding inside the button to keep the hit range.
Common questions
The button is already large—why do people still mis-tap?
Most of the time it is because there isn’t enough spacing from neighboring tappable targets, or a wider invisible hit area surrounds the button. Widening the spacing often helps more than continuing to enlarge the button.
Do desktop web buttons need to be the full 48 px?
No. A mouse can aim precisely; 24 px or above with whitespace is the common desktop practice. 48 px can be an option for touch-hybrid devices or accessibility size settings, but it doesn’t need to be the global default.
If the whole card is tappable, does that count as making the button too big?
That is a card hit area rather than a normal button. Making the card fully tappable shortens the task path, but secondary actions such as favorite or delete still need their own independent hit areas, so that the targets don’t compete.
When a button sits next to an input field, which size takes priority?
The button height should share the same baseline as the adjacent input. It isn’t recommended to make the button suddenly taller than the input just for emphasis. Use color and icon weight to establish primary/secondary distinction.
Before you make a button bigger, answer three questions: Is this button the only primary action on the page? Who are the closest tappable targets around it? Is the spacing 4 px, 8 px, or 12 px? If you can’t answer, draw the hit-area map first and then change the size. Before delivery, clearly state in the handover documentation whether the change is to visual size or to the hit-area range, because the two map to different development workloads and acceptance criteria. In 2026, for highly componentized interfaces, it is usually best to adjust design variables first, rather than editing a single page style.
-
 UI Design & Prototype for Sunwayland's ThingNet IIoT Platform
UI design and prototyping for ThingNet IIoT ...
-
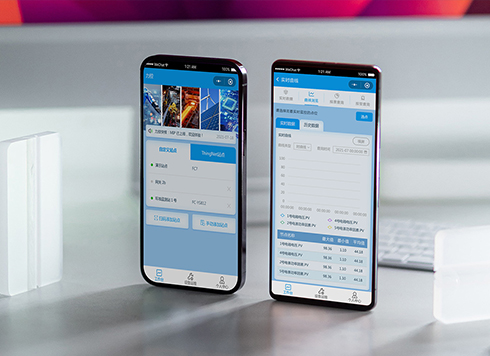 Likong Industrial IoT Tech Co., Ltd. Mini-program UI/UX Design
IIoT firms: mobile mini-program + platform. ...
-
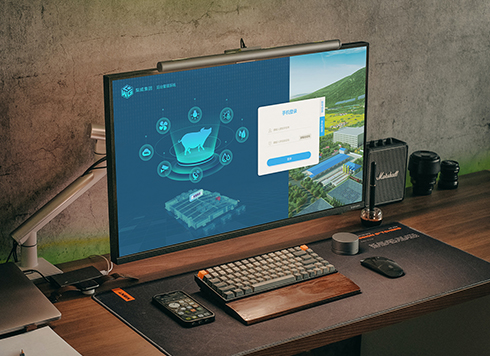 Livy Pig Farming IoT Platform UI Design
This IoT system uses sensors to monitor hog ...
-
 UI Design of the Internet Advertising Platform (a Sci-tech Sense Official Website)
The corporate website UI features a futuris ...
-
A user hits Back halfway through filling a form and exits the entire flow—is it too many nested modal layers or the wrong entry point?
Date: Sep 14, 2026 Read: 3
-
When a page takes two or three seconds to load, should you show a spinner or a skeleton first to keep users around?
Date: Sep 13, 2026 Read: 5
-
Admin table action buttons always need scrolling to the far right — too many columns, or just the wrong order?
Date: Sep 12, 2026 Read: 8
-
If you leave a half-filled form to look something up and the hint is gone when you return, can you still tell which field it was?
Date: Sep 11, 2026 Read: 16
-
Long Paragraphs Go Unread: Is Font Size Really to Blame?
Date: Sep 10, 2026 Read: 20